This method was originally prepared for using a mobile phone to bypass the firewall when returning to China, but it did not succeed. This blog post introduces several simple methods for bypassing the firewall when returning to China. In particular, the method of setting up an AWS VPN server by yourself. I have been using AWS-VPN to bypass the firewall for nearly a year, and only once was the IP address blocked. After restarting the server, I changed the IP address and immediately resumed surfing the Internet. The performance is good, the speed is fast, and you can watch videos by bypassing the firewall. The disadvantage of this method is that the PPTP protocol used is outdated and not secure enough. Android phones above Android 12 do not support it. Therefore, newer Android phones cannot use this method. In order to support Android phones to bypass the firewall, experiments were conducted on AWS using OpenVPN. OpenVPN is a widely used open source VPN. It has high security and is free. Since the OpenVPN client is a third-party app, it can be used on various terminals, including mobile phones. After returning to China for testing, it was found that OPENVPN may have too obvious features and has been blocked. However, the following methods can also be used for mobile phones to use VPN to surf the Internet for security and privacy purposes.
Method 1: AWS Marketplace
1. Register at OpenVPN.net and choose a free plan that only supports two simultaneous connections. If you need more connections, you can choose a plan for $7 per month. Generally, two connections are enough. After submission, an activation code will be generated. Save this long code locally, which will be needed when setting up the server.
2. Open a new account on Amazon AWS. AWS provides 12 months of free service.
3. After opening an account, search for OpenVPN Access Server in AWS Marketplace and click on the first result. Don’t be misled by the marked price. As long as you choose a free tier virtual machine, the final price is free. Click Continue to subscribe -> continue to launch through EC2, and you will reach the configuration page. Select the free t2.micro for instance type, select a name for a key pair, and click Create new key pair -> Create key pair. The generated pem key file will be automatically downloaded to the local computer. This file is used for security authentication of server connection. Select the automatically generated network access rules for security group in Firewall, and select the 5 options above. Free Storage can be increased to a maximum of 30GB. Click “launch Instance”.

4. After the instance is generated, write down the IP address. Click connect to your instance, select EC2 Instance Connect (the leftmost one), and connect to the server to complete the final configuration.

A Linux operation window will pop up.
The configuration process is automatic, just press Enter to answer the default questions. For VPN servers that support a small number of users to bypass the firewall, only the following situations need to change the default input:
Open source software agreement: Please enter ‘yes’ to indicate your agreement [no]: Answer yes
Encryption algorithm: > Press ENTER for default [secp384r1]: Answer rsa
Self-signed web certificate encryption algorithm: > Press ENTER for default [secp384r1]: Answer rsa
VPN default route for user traffic: > Press ENTER for default [no]: yes
VPN default route for user DNS traffic: > Press ENTER for default [no]: yes
Finally, you need to set an access password for an openvpn user with administrative privileges. After copying and pasting the activation code, the server starts and displays information in the following format:
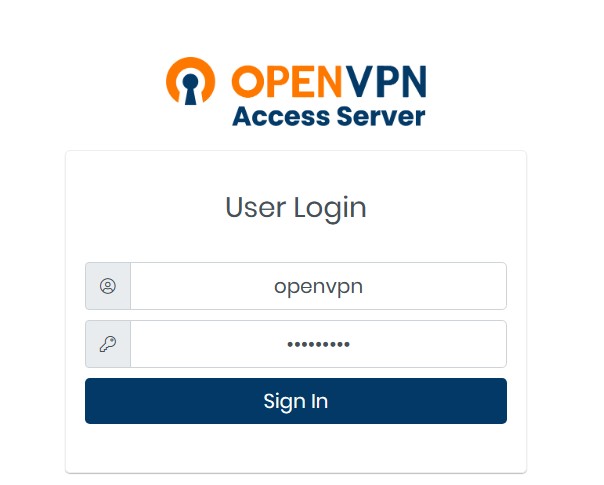
Client UI: https://54.227.3.116:943/
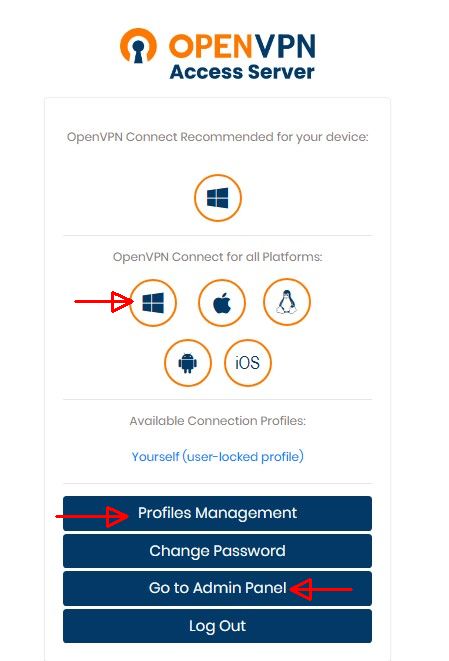
Open a browser: Copy the above UI address into the address bar. Since there is no certificate, the browser will warn. Click advanced -> connect to the openvpn access page. First, select the terminal type, and the corresponding client will be automatically downloaded to the terminal. Then click “Profiles Management” to download the openvpn profile. Go to admin panel and enter the management platform. On this platform, first add a user name, such as user1, set the password for Internet access, download the user’s profile file and save it. The user can use the openvpn client to connect to the openvpn server on the terminal. There are two ways to connect. The first is to enter the server IP address, user name and password to log in; the second is to drag and drop the downloaded profile file.


On the management platform, click VPN setting, and make the following configuration in Routing.
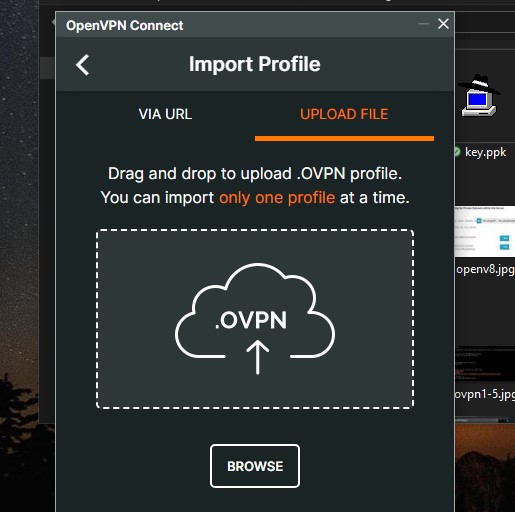
Go back to the OpenVPN client, click Import Profile -> Upload File, drag and drop the profile of user1 that has just been downloaded to the OVPN cloud map, and user1 will be connected to the VPN.


Thanks for sharing. I read many of your blog posts, cool, your blog is very good.
Your article helped me a lot, is there any more related content? Thanks!
Can you be more specific about the content of your article? After reading it, I still have some doubts. Hope you can help me.
Can you be more specific about the content of your article? After reading it, I still have some doubts. Hope you can help me.